
Transform your living space with our expertly curated collection of 10 Stunning Home Decor Ideas for DIY Floating Shelves that combine aesthetic appeal with practical storage solutions. These wall-mounted display platforms offer the perfect blend of functionality and contemporary design, allowing you to showcase treasured collectibles, organize essential items, or create visual interest in any room. Whether you’re a seasoned interior decorator or a home improvement beginner, these suspended shelving options provide versatile opportunities to enhance your residential environment without consuming valuable floor space.
Elevate your interior design strategy with these innovative floating shelf installations that range from rustic reclaimed wood varieties to sleek minimalist brackets that create the illusion of objects hovering effortlessly against your wall. Our comprehensive guide explores various mounting techniques, material selections, and styling approaches that complement diverse decor themes from modern farmhouse to industrial chic. Discover how these floating display units can transform awkward corners, highlight architectural features, or create custom organizational systems in kitchens, bathrooms, living areas, and home offices—all while adding sophisticated dimensional elements that enhance your home’s visual appeal and market value.
Creative DIY Floating Shelf Home Decor Ideas for Every Room

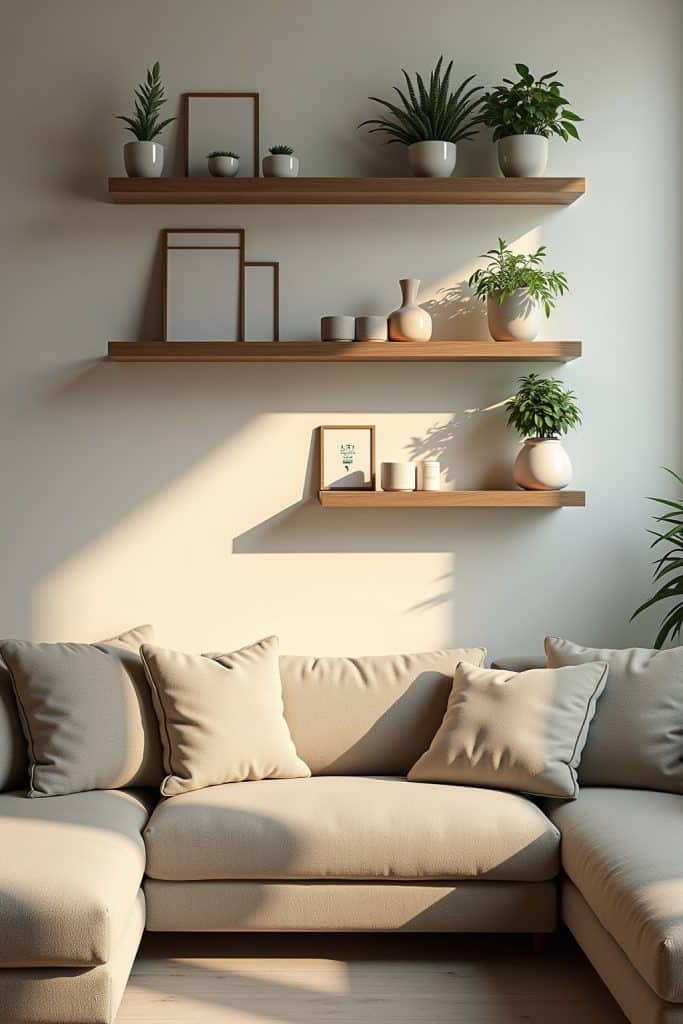
Transforming your living spaces with DIY floating shelves offers endless opportunities for showcasing your personal style while maximizing storage in a visually appealing way. These versatile wall-mounted wonders can be customized to complement any aesthetic, from minimalist and modern to rustic and bohemian. With just a few basic tools and materials, you can create stunning focal points that display treasured photos, cherished collectibles, or everyday essentials in every room of your home. The beauty of DIY floating shelves lies in their adaptability—they can be crafted from reclaimed wood for a weathered look, painted in bold colors for a contemporary vibe, or stained to match existing furniture. Additionally, incorporating unexpected elements like integrated lighting, decorative brackets, or mixed materials can elevate your shelving from simple storage to spectacular statement pieces. Thoughtfully arranging your items using design principles like balance, contrast, and rhythm transforms ordinary shelves into extraordinary displays that reflect your personality. Whether you’re a seasoned DIY enthusiast or a beginner looking for an accessible home improvement project, custom floating shelves provide the perfect canvas for expressing your creativity while solving storage challenges.
1. Create a reading nook with staggered floating shelves to display your favorite books and small plants
2. Install corner floating shelves to maximize unused wall space in tight areas
3. Build a floating desk with shelves above for a compact home office solution
4. Design a geometric pattern with multiple small floating shelves for a modern art display
5. Craft floating bathroom shelves with built-in towel bars for functionality and style
6. Arrange kitchen floating shelves with under-shelf lighting to showcase dishware and spices
7. Construct a floating entertainment center with hidden cord management for a sleek look
8. Implement floating nightstands with integrated USB charging ports for bedside convenience
9. Fashion floating shelves with integrated picture frames for a unique family photo display
10. Build wraparound floating shelves that continue around corners for a cohesive, flowing aesthetic
Essential Materials for Building Your Own DIY Floating Shelves

Building your own DIY floating shelves requires several essential materials to ensure a sturdy and attractive final product. First, you’ll need high-quality wood boards that match your desired aesthetic, such as pine, oak, or walnut, cut to your preferred shelf dimensions. A reliable stud finder is crucial for locating the wall supports that will bear the weight of your shelves and their future contents. Construction adhesive and wood screws provide the necessary strength for connecting your shelf components and securing them to the wall. For the mounting hardware, you’ll need metal brackets, floating shelf rods, or a French cleat system depending on your chosen installation method. Basic woodworking tools including a drill, level, measuring tape, and saw are indispensable for precise cutting and assembly. Wood finishing supplies such as sandpaper, wood filler, stain, paint, or sealant will help you achieve your desired look while protecting the wood. Lastly, don’t forget safety equipment like protective goggles, gloves, and a dust mask to keep yourself protected throughout the building process.
1. Wood boards (pine, oak, walnut, or plywood)
2. Stud finder
3. Construction adhesive
4. Wood screws in various sizes
5. Mounting hardware (brackets, rods, or cleats)
6. Drill with assorted bits
7. Level, measuring tape, and pencil
8. Circular saw or miter saw
9. Sandpaper (various grits) and wood filler
10. Wood finishes (stain, paint, polyurethane, or varnish)
Step-by-Step Guide to Installing Homemade Floating Shelves
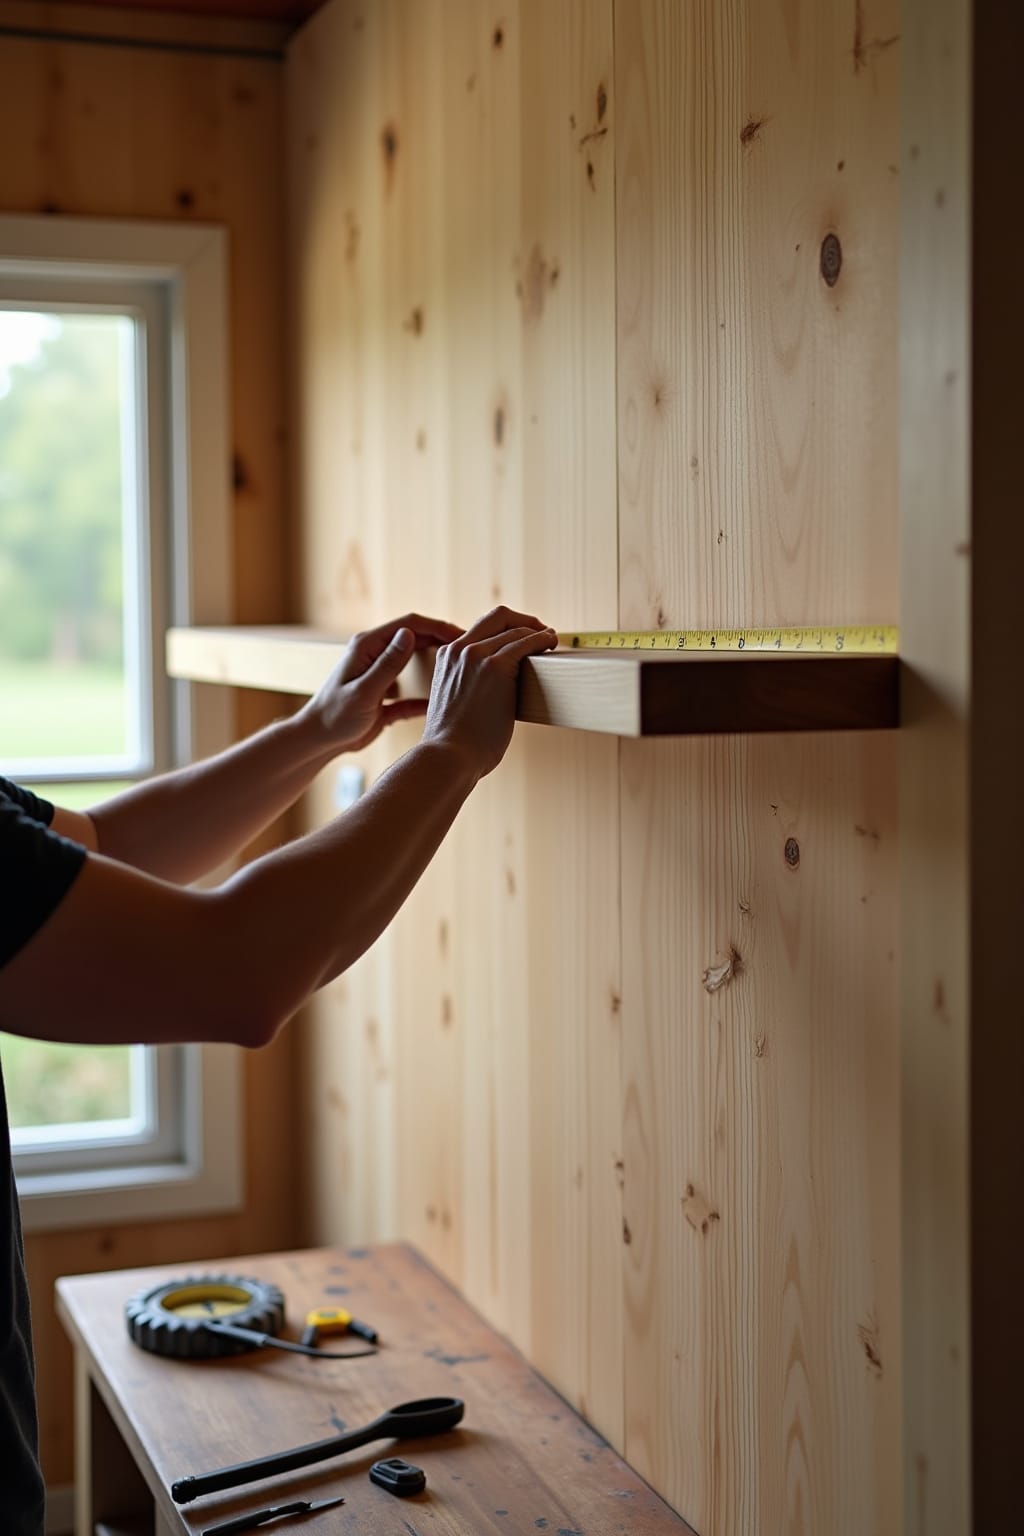
Transform your bare walls into stylish storage spaces with our comprehensive guide to installing DIY floating shelves that will elevate your home’s interior design instantly. You’ll be amazed at how these seemingly complicated wall fixtures can actually be installed with just a few tools and some basic carpentry skills. Before diving in, ensure you have accurate measurements of your wall space and have selected materials that complement your existing home decor while providing adequate strength for your display items. Proper planning prevents frustrating mistakes and ensures your floating shelves will be both beautiful and functional for years to come. With our detailed instructions, you’ll avoid common pitfalls that often plague first-time shelf installers, such as uneven mounting or inadequate support for heavier objects. Remember that precision is key when it comes to creating professional-looking floating shelves that appear to effortlessly extend from your wall. Follow our step-by-step process below to achieve stunning results that will have your guests wondering if you hired a professional carpenter.
1. Gather all necessary tools and materials (drill, level, stud finder, screws, brackets, shelf boards)
2. Measure and mark your desired shelf locations with pencil and level
3. Locate and mark wall studs for secure anchoring
4. Pre-drill holes in your wall at marked locations
5. Install mounting hardware or cleats according to manufacturer instructions
6. Prepare shelf boards by sanding edges and applying desired finish
7. Allow sufficient drying time for any paint or stain applied to shelves
8. Carefully slide shelf onto mounted hardware or brackets
9. Use level to confirm proper horizontal alignment
10. Secure shelf to mounting hardware with provided screws if required
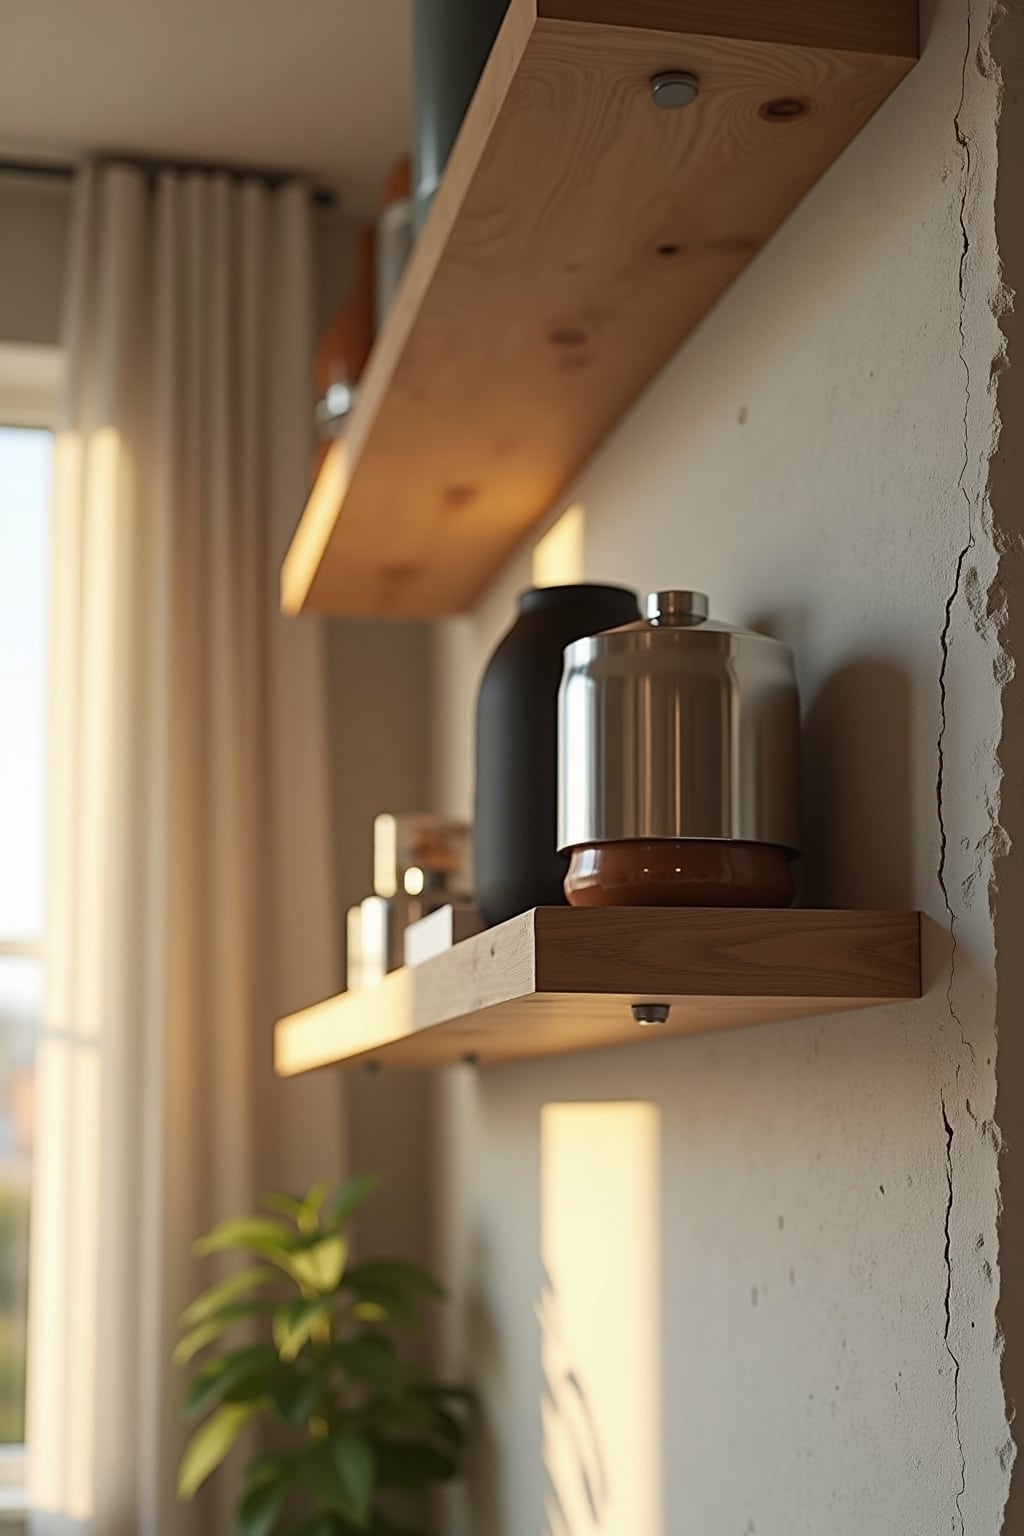
Unique Floating Shelf Designs to Transform Your Home Decor

Ready to completely transform your living space without breaking the bank? Floating shelves are the perfect blend of functionality and style, offering endless possibilities to showcase your personality and taste. You can easily create a stunning focal point in any room by installing uniquely designed floating shelves that complement your existing décor. Think beyond the standard rectangular wooden shelf and explore designs that will make your guests ask, „Where did you get that?“ With just a few tools and some creativity, you can craft custom floating shelves that look like they came straight from a high-end design magazine. The best part is that most of these projects can be completed in a weekend, giving you instant gratification and a sense of accomplishment. Let your imagination run wild as you consider these innovative floating shelf designs that will breathe new life into your home.
1. Cloud-shaped shelves with integrated LED lighting for a dreamy nursery or reading nook
2. Geometric honeycomb shelves that can be arranged in countless combinations
3. Wine barrel stave shelves that add rustic charm to dining areas or home bars
4. Corner floating shelves that maximize often-wasted space with a cascading design
5. Industrial pipe and wood combinations that bring an urban edge to any room
6. Invisible bookshelf designs that make books appear to float magically on your wall
7. Live-edge wood shelves showcasing the natural beauty of timber with unique patterns
8. Puzzle-piece interlocking shelves that can be reconfigured whenever you desire
9. Floating drawer shelves that provide hidden storage while maintaining a sleek appearance
10. Picture frame shelves with built-in ledges for displaying photos alongside décor items
Budget-Friendly DIY Floating Shelf Ideas for Home Decorators

Transforming your space doesn’t have to drain your wallet when you explore these budget-friendly floating shelf options that combine style and function. With just a few basic tools and materials from your local hardware store, you can create custom shelving that perfectly suits your aesthetic while showcasing your favorite décor pieces. Repurposing items you already own, like old wooden boards or unused drawers, can significantly cut down on costs while adding unique character to your walls. The beauty of DIY floating shelves lies in their versatility—they work equally well in cramped apartments where floor space is precious or in spacious homes where you want to create visual interest on empty walls. What’s more, these projects typically take just a weekend afternoon to complete, making them perfect for busy home decorators looking for quick transformations. You’ll be amazed at how such a simple addition can dramatically change the feel of a room without the hefty price tag of store-bought alternatives. Remember that the most budget-friendly designs often become the most conversation-worthy features in your home, especially when they highlight your personal creativity.
1. Transform reclaimed wood planks with simple brackets for a rustic farmhouse look
2. Create minimalist shelves using painted pine boards and hidden bracket systems
3. Repurpose old dresser drawers into unique shadow-box style floating shelves
4. Build corner floating shelves to maximize awkward wall spaces
5. Use plumbing pipes and flanges with wooden boards for industrial-style shelving
6. Convert wooden crates into open-front floating storage units
7. Craft floating picture ledges from trim pieces and thin boards
8. Design floating cube shelves using inexpensive plywood and wood glue
9. Upcycle old cutting boards into kitchen floating shelves with minimal hardware
10. Make floating rope shelves using thick rope, wooden boards, and basic knot techniques
Styling Your DIY Floating Shelves: Decor Ideas and Arrangements

Transform your DIY floating shelves from simple storage solutions into stunning focal points with the right styling approach that reflects your personality and complements your home’s aesthetic. You’ve put in the hard work to build and install these beautiful shelves, so now it’s time to have fun arranging items that showcase your style while maintaining visual balance. Remember that styling shelves is both an art and a science—combining decorative elements with practical items creates interest while ensuring your shelves remain functional. Try grouping items in odd numbers (particularly threes and fives) as this naturally creates more visually appealing arrangements than even-numbered groupings. Don’t be afraid to experiment with height variations, textures, and colors to create dynamic displays that draw the eye and add dimension to your walls. Step back frequently during the styling process to assess the overall look, making adjustments until you achieve a balanced composition that feels intentional yet not overcrowded. Your floating shelves offer the perfect opportunity to display treasured items while expressing your unique design sensibility, so take your time and enjoy the creative process.
Here are 10 stylish ways to arrange your DIY floating shelves:
1. Create a mini gallery with framed photos, small artwork, and decorative objects of varying heights
2. Style with books arranged both vertically and horizontally, using decorative bookends for visual interest
3. Incorporate plants like trailing pothos or small succulents to add natural elements and texture
4. Display a collection of vintage items or travel souvenirs that tell your personal story
5. Mix practical kitchen items with decorative pieces on kitchen floating shelves
6. Layer items by placing taller objects at the back and smaller ones in front
7. Use a cohesive color scheme while varying textures for a sophisticated look
8. Add ambient lighting with small battery-operated LED lights or tiny table lamps
9. Incorporate seasonal decor that can be easily swapped out to refresh your displays
10. Leave some negative space between groupings to prevent visual overwhelm and create breathing room
Common Mistakes to Avoid When Creating DIY Floating Shelf Home Decor
Let’s face it, we’ve all been there—excitedly starting a DIY floating shelf project only to run into unexpected challenges that leave our walls damaged and our spirits crushed. When creating your own floating shelves, avoiding common pitfalls can save you time, money, and a whole lot of frustration. One of the biggest mistakes DIY enthusiasts make is underestimating the weight capacity needed for their shelves, leading to dangerous sagging or complete failure when displaying books or heavier décor items. You might also be tempted to skip measuring twice before cutting or drilling, which almost always results in uneven shelves or misaligned mounting brackets that scream „amateur“ rather than „interior design genius.“ Many beginners rush through the finishing process, not allowing proper drying time between coats of paint or stain, resulting in a sticky, unprofessional look that cheapens your entire display. Remember that proper planning prevents poor performance, especially when it comes to creating floating shelves that will showcase your treasured items while enhancing your home’s aesthetic appeal.
1. Using inadequate wall anchors for the shelf’s intended weight
2. Failing to locate and utilize wall studs for proper support
3. Choosing low-quality materials that warp or bend over time
4. Skipping the level during installation, resulting in crooked shelves
5. Neglecting to sand edges and corners for a polished, professional look
6. Rushing through the staining or painting process
7. Miscalculating spacing between multiple shelves
8. Not accounting for the shelf’s thickness in your measurements
9. Overloading finished shelves beyond their weight capacity
10. Forgetting to consider the visual balance with surrounding décor elements
Maintenance Tips for Long-Lasting DIY Floating Shelf Displays

Your DIY floating shelves can remain stunning for years with proper maintenance, saving you both time and money on replacements. Dusting should become your weekly ritual, using a microfiber cloth that captures particles rather than merely spreading them around. Every month, take a moment to check that all brackets and hardware remain tight, as everyday vibrations from walking or closing doors can gradually loosen screws. For wooden shelves, apply a fresh coat of protective finish annually to prevent warping from humidity changes that naturally occur in your home. Be mindful of weight distribution, as overloading one section can create stress that eventually causes sagging or even complete failure. Remember that sunlight is both friend and foe—while it beautifully illuminates your displays, prolonged exposure can fade both your shelves and precious items. Take seasonal opportunities to completely clear your shelves for a thorough cleaning and inspection, treating this maintenance as an opportunity to refresh your displays with current seasonal décor.
1. Remove all items and dust thoroughly weekly
2. Check and tighten all hardware monthly
3. Apply protective finish to wooden shelves annually
4. Rotate decorative items to distribute weight evenly
5. Use felt pads under hard objects to prevent shelf scratches
6. Keep moisture-sensitive items away from bathroom or kitchen shelving
7. Rebalance items after adding or removing display pieces
8. Install curtains or UV film if shelves receive direct sunlight
9. Clean glass or metal components with appropriate non-abrasive cleaners
10. Take photos of your favorite arrangements before seasonal changes for future reference


