Du möchtest deinen Wohnräumen mit stilvollen und funktionalen Elementen mehr Charakter verleihen, ohne gleich große Umbauten vorzunehmen? Dieser Text liefert dir 10 beeindruckende Ideen für selbstgemachte schwebende Regale, die nicht nur Stauraum schaffen, sondern auch als wahre Design-Statements dienen. Ideal für alle, die ihre Inneneinrichtung individuell gestalten und einen Hauch von Modernität einbringen möchten.
Das sind die beliebtesten Schweberegale Set Produkte

SONGMICS Wandregal, Schweberegal, 3er Set, 10 x 38 cm, Wandboard für Bilderrahmen und Bücher, Bilderregal für Wo ...
zum Angebot »
STOREMIC Wandregal, regal weiß wand 60cm, Leicht zu montieren Regalbrett 2er-Set, Moderne dekorative Schweberega ...
zum Angebot »
WOLTU Wandregal 2er Set, Regalbrett, freischwebend Schweberegal, CD DVD Wand Regal Wandboard für Büro, Wohnzimmer ...
zum Angebot »
VASAGLE Wandregal, Schweberegal, 3er Set, Regalbrett, 2 Montagemöglichkeiten, 30/35/40 cm, für Wohnzimmer, Küche ...
zum Angebot » | Schwebendes Regal als Küchenregal hängend, Badregal und ...")
MILUKA Schweberegal Metall Olivgrün | 2er Set (60 cm) | Schwebendes Regal als Küchenregal hängend, Badregal und ...
zum Angebot »
AFAjwsc Wandregal Holz Weiß, Schweberegal 2er Set Regal Wand, 42cm Holz Schweberegale mit Handtuchhalter für Wohn ...
zum Angebot »
Uten Wandregal aus Metall, Schweberegal 3er Set,Länge 40/35/30 cm, Regale für Wände, für Dekos, Wohnzimmer, Bad ...
zum Angebot »
VASAGLE Wandregal, 4er Set, Schweberegal, Regalbrett, 20 x 60 x 3,8 cm, Wandboard für Bilderrahmen, Deko, Regal f� ...
zum Angebot »

Die Kunst der schwebenden Regale: Mehr als nur Stauraum
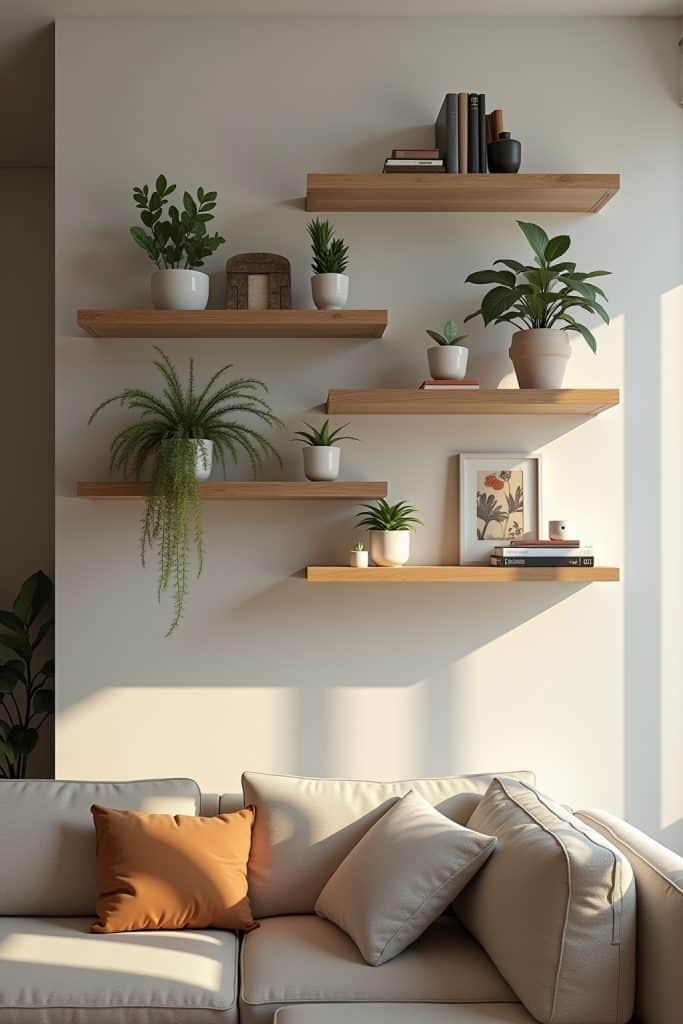
Schwebende Regale, auch bekannt als Wandregale ohne sichtbare Halterungen, sind ein Meisterwerk des Minimalismus und der Raffinesse in der modernen Wohnraumgestaltung. Sie erzeugen die Illusion, als würden sie scheinbar magisch an der Wand schweben, und bieten dabei wertvollen Platz für Dekorationsobjekte, Bücher oder Gebrauchsgegenstände. Ihr schlichtes Design fügt sich nahtlos in unterschiedlichste Einrichtungsstile ein, von skandinavisch-minimalistisch bis hin zu rustikal-industriell. Die DIY-Variante dieser Regale eröffnet dir zudem die Möglichkeit, Materialien, Größen und Oberflächen ganz nach deinem persönlichen Geschmack und den spezifischen Anforderungen deines Raumes zu wählen. Dies ermöglicht eine maßgeschneiderte Lösung, die sowohl ästhetisch ansprechend als auch funktional überlegen ist. Die Investition in DIY schwebende Regale ist nicht nur eine ökonomische Entscheidung, sondern auch eine kreative Befriedigung, indem du deinen eigenen Wohnraum mit einzigartigen Stücken personalisierst.
1. Das schlichte Holzbrett-Regal: Zeitlose Eleganz
Die einfachste, aber oft wirkungsvollste Methode, um schwebende Regale zu realisieren, ist die Verwendung eines einzelnen Holzbretts. Wähle hierfür ein hochwertiges Massivholz, wie Eiche, Nussbaum oder Kiefer, je nach gewünschtem Look und Budget. Die Holzart hat einen erheblichen Einfluss auf die Gesamtästhetik. Eiche beispielsweise bringt eine warme, luxuriöse Anmutung mit sich, während Kiefer eine rustikalere, bodenständigere Atmosphäre schafft. Du kannst das Holz unbehandelt lassen, um eine natürliche Haptik zu erzielen, oder es ölen, beizen oder lackieren, um es an deine bestehende Einrichtung anzupassen. Die Befestigung erfolgt meist über spezielle Schwerlast-Regalträger, die nach der Montage unsichtbar werden. Achte auf die Tragfähigkeit der Träger, insbesondere wenn du plane, schwere Gegenstände auf dem Regal zu platzieren. Die Tiefe und Länge des Bretts sollten proportional zur Wandfläche und der beabsichtigten Nutzung gewählt werden. Ein tiefes, langes Regal eignet sich hervorragend für eine Sammlung von Büchern, während ein schmaleres Regal perfekt für kleine Vasen oder Bilderrahmen ist.
2. Das „Hidden Bracket“ Regal: Perfekte Illusion
Dieses Design spielt mit der Illusion. Hierbei werden spezielle, oft als „invisible shelf brackets“ oder „concealed shelf supports“ bezeichnete Halterungen verwendet. Diese werden zunächst in die Wand gebohrt und dann in das Holzregal eingesteckt. Die Halterungen sind so konzipiert, dass sie beim Anbringen des Regals vollständig verschwinden. Die Auswahl der richtigen Halterungen ist hierbei entscheidend. Sie müssen stark genug sein, um das Gewicht des Regals und seiner Beladung sicher zu tragen. Die Wahl der Halterung hängt auch von der Dicke des Holzbretts ab. Dickere Bretter bieten in der Regel mehr Platz für die Aufnahme der Halterungen. Die Montage erfordert Präzision, um sicherzustellen, dass das Regal gerade und sicher an der Wand hängt. Viele dieser Halterungen lassen sich in der Höhe und Tiefe justieren, was die Nivellierung erleichtert.
3. Das Industrielle Rohrregal: Robuster Charme
Für einen Hauch von Industrial-Chic sind Regale aus Metallrohren und Fittings eine ausgezeichnete Wahl. Diese können entweder als komplettes Regalmodul mit mehreren Etagen oder als einfache, einzelne Ablage konstruiert werden. Die Rohre und Fittings sind in Baumärkten erhältlich und lassen sich zu verschiedenen Formen und Größen zusammenschrauben. Du kannst hierbei zwischen verschiedenen Oberflächen wählen, wie z.B. verzinktes Stahl, Schwarz oder Kupfer, um den gewünschten Look zu erzielen. Die Holzbretter werden dann einfach auf die so geschaffene Struktur aufgelegt oder fest verschraubt. Dieser Stil eignet sich besonders gut für Loftwohnungen oder Räume mit einem urbanen Ambiente. Die Haltbarkeit und Stabilität dieser Konstruktionen sind bemerkenswert, wodurch sie sich auch für schwerere Gegenstände eignen.
4. Das rahmenlose Eckregal: Platzoptimierung
Ecken sind oft ungenutzte Flächen. Schwebende Eckregale sind eine geniale Lösung, um diese Bereiche intelligent zu nutzen und gleichzeitig ein optisches Highlight zu setzen. Sie können aus einem oder mehreren dreieckigen oder trapezförmigen Holzbrettern gefertigt werden, die bündig in die Ecke montiert werden. Die Befestigung erfolgt ebenfalls mit unsichtbaren Winkelhaltern, die diskret hinter dem Regal verschwinden. Diese Art von Regal eignet sich hervorragend für Pflanzen, kleine Sammlungen oder als Ablagefläche für Schlüssel und Post im Flur.
5. Das „Book Nook“ Regal: Bücherwürmer aufgepasst
Dieses Regal ist speziell für Buchliebhaber konzipiert. Es nutzt eine innovative Technik, bei der ein unsichtbarer Halter verwendet wird, der sich in das Buch selbst integriert. Das unterste Buch wird dabei „aufgeklappt“ und der Haltemechanismus im Inneren verborgen. Anschließend werden weitere Bücher auf diesen Mechanismus gestapelt, sodass sie den Anschein erwecken, als würden sie von der Wand schweben. Dies erzeugt einen faszinierenden und überraschenden Effekt. Achte darauf, Bücher mit einem stabilen Einband zu verwenden, um die Langlebigkeit der Präsentation zu gewährleisten. Die maximale Traglast ist hierbei natürlich durch die Stabilität des einzelnen Buches begrenzt.
6. Das Akzentregal mit integrierter Beleuchtung: Stimmungsvolle Highlights
Verleihe deinen schwebenden Regalen eine zusätzliche Dimension, indem du eine dezente LED-Beleuchtung integrierst. Dies kann durch LED-Streifen erfolgen, die unter dem Regal angebracht werden und ein sanftes Umgebungslicht erzeugen, oder durch kleine Spots, die auf das Regal gerichtet sind. Die Beleuchtung betont nicht nur die Objekte auf dem Regal, sondern schafft auch eine stimmungsvolle Atmosphäre im Raum. Achte bei der Auswahl der Beleuchtung auf die Farbtemperatur und Helligkeit, um die gewünschte Wirkung zu erzielen. Warmweiße LEDs schaffen eine gemütliche Atmosphäre, während kühleres Licht eher modern und funktional wirkt. Viele LED-Streifen lassen sich dimmen und per Fernbedienung steuern, was zusätzliche Flexibilität bietet.
7. Das modulare System: Flexibilität pur
Für diejenigen, die Flexibilität schätzen, sind modulare schwebende Regalsysteme die ideale Lösung. Diese bestehen aus einzelnen Elementen, die nach Belieben kombiniert und neu angeordnet werden können. Dies ermöglicht es dir, deine Regale im Laufe der Zeit anzupassen und zu erweitern, je nach deinen sich ändernden Bedürfnissen und deinem Geschmack. Die Module können in verschiedenen Größen, Formen und Materialien erhältlich sein und oft mit unterschiedlichen Befestigungsarten kombiniert werden. Dies ist besonders vorteilhaft, wenn du oft dein Interieur umgestaltest oder verschiedene Funktionen für deine Regale benötigst. Die individuellen Komponenten sind oft so konzipiert, dass sie nahtlos ineinandergreifen oder einfach an vorhandene Trägersysteme angehängt werden können.
8. Das schwebende Wurzelholzregal: Organische Kunst
Für einen Hauch von Natur und Einzigartigkeit kannst du schwebende Regale aus natürlichen Wurzelhölzern in Betracht ziehen. Jedes Stück ist ein Unikat und bringt seine eigene organische Form und Textur mit. Diese Regale sind oft bereits durch ihre natürliche Beschaffenheit ein Kunstwerk und benötigen nur eine dezente Befestigung, um ihre volle Wirkung zu entfalten. Die unregelmäßigen Formen erfordern oft eine individuelle Befestigungslösung, die an die Konturen des Holzes angepasst ist. Dies kann eine Herausforderung sein, aber das Endergebnis ist ein absolut einzigartiges Möbelstück, das deinem Raum eine außergewöhnliche Note verleiht.
9. Das Wanddisplay-Regal: Sammelstücke in Szene setzen
Wenn du kleine Sammlerstücke, Figuren oder Souvenirs ausstellen möchtest, sind schmale Wanddisplay-Regale die perfekte Wahl. Diese sind oft nur wenige Zentimeter tief und eignen sich hervorragend, um kleinere Objekte prominent zu präsentieren, ohne dabei zu viel Platz einzunehmen. Sie können aus verschiedenen Materialien wie Holz, Acryl oder Metall gefertigt sein. Manche Modelle verfügen über eine kleine Kante oder ein Profil, um zu verhindern, dass die ausgestellten Objekte herunterfallen. Die Montage ist in der Regel unkompliziert und erfordert nur wenige Befestigungspunkte.
10. Das „Geheime“ Regal hinter Kunstwerken: Ein cleverer Trick
Eine überraschende und clevere DIY-Idee ist ein schwebendes Regal, das hinter einem größeren Wandbild oder einem Spiegel versteckt ist. Die Konstruktion ist so angelegt, dass sie sich nahtlos in die Wand einfügt und erst auf den zweiten Blick als Regal erkennbar ist. Dies kann durch ein leicht versetztes Bild erreicht werden, das Zugang zu einem dahinterliegenden Regal ermöglicht, oder durch eine spezielle Konstruktion, die das Regal als Teil des Kunstwerks erscheinen lässt. Hierbei ist ein hohes Maß an Präzision bei der Planung und Ausführung erforderlich, um den gewünschten Versteckeffekt zu erzielen. Die Traglast ist hierbei oft limitiert, da der Fokus auf der Tarnung liegt.
Übersicht: DIY schwebende Regale im Vergleich
| Material | Stil | Montageaufwand | Tragfähigkeit | Ästhetik |
|---|---|---|---|---|
| Massivholz | Klassisch, Modern, Rustikal | Mittel | Hoch | Warm, Natürlich, Vielseitig |
| Metallrohre | Industriell, Urban | Mittel bis Hoch | Sehr Hoch | Robust, Markant, Einzigartig |
| Wurzelholz | Organisch, Bohemian | Hoch (individuell) | Mittel | Einzigartig, Naturnah, Kunstvoll |
| Acryl/Kunststoff | Modern, Minimalistisch | Gering | Gering bis Mittel | Schlicht, Leicht, Translucent |
| Kombinationen (Holz/Metall) | Vielfältig | Mittel | Hoch | Individuell, Kontrastreich |
FAQ – Häufig gestellte Fragen zu 10 Stunning Home Decor Ideas: DIY Floating Shelves
Wie befestige ich schwebende Regale sicher an der Wand?
Die sichere Befestigung von schwebenden Regalen hängt maßgeblich von der Art der Halterung und der Beschaffenheit deiner Wand ab. Für die meisten DIY-Projekte werden spezielle Schwerlast-Regalträger oder unsichtbare Regalwinkel verwendet. Diese werden zunächst in die Wand geschraubt. Bei Hohlwänden (z.B. Gipskarton) ist es unerlässlich, geeignete Hohlraumdübel zu verwenden, um eine ausreichende Tragfähigkeit zu gewährleisten. Achte darauf, die Bohrlöcher an den richtigen Stellen zu setzen und die Schrauben fest anzuziehen. Die Auswahl der richtigen Dübel und Schrauben ist entscheidend für die Sicherheit.
Welche Materialien eignen sich am besten für DIY schwebende Regale?
Für DIY schwebende Regale eignen sich eine Vielzahl von Materialien. Massivholz ist eine beliebte Wahl wegen seiner Haltbarkeit und natürlichen Schönheit. Du kannst Holzarten wie Eiche, Nussbaum, Kiefer oder auch Recyclingholz verwenden. Metall, insbesondere Rohre im Industrial-Stil, verleiht einen robusten Charme. Auch Acryl oder Plexiglas kann für einen modernen, leichten Look eingesetzt werden. Die Wahl des Materials sollte sowohl dem gewünschten Stil als auch der Tragfähigkeit des Regals Rechnung tragen.
Wie viel Gewicht können schwebende Regale tragen?
Die maximale Tragfähigkeit von schwebenden Regalen variiert stark und hängt von mehreren Faktoren ab: der Qualität und Art der verwendeten Regalträger, der Stärke und dem Material des Regals selbst sowie der Art der Wandbefestigung. Hochwertige Schwerlastträger und eine solide Wandmontage können Tragfähigkeiten von mehreren Kilogramm bis hin zu über 30 Kilogramm pro Regal ermöglichen. Bei dünneren Brettern oder unsachgemäßer Befestigung kann die Tragfähigkeit deutlich reduziert sein. Es ist immer ratsam, die Empfehlungen des Herstellers für die Regalträger zu beachten und im Zweifelsfall lieber eine zusätzliche Halterung anzubringen.
Kann ich schwebende Regale auch in feuchten Räumen wie dem Badezimmer anbringen?
Ja, schwebende Regale können auch in feuchten Räumen wie dem Badezimmer angebracht werden, jedoch mit einigen wichtigen Überlegungen. Wähle für das Regal selbst Materialien, die feuchtigkeitsresistent sind, wie behandeltes Holz (geölt, lackiert), Kunststoff oder spezielle Metalllegierungen. Die Regalträger sollten ebenfalls korrosionsbeständig sein. Achte besonders auf eine sorgfältige Abdichtung rund um die Bohrlöcher, um Wasserschäden an der Wand zu vermeiden. Regelmäßiges Lüften des Raumes hilft zusätzlich, die Lebensdauer der Regale und der umliegenden Materialien zu verlängern.
Wie installiere ich unsichtbare Regalhalterungen korrekt?
Die Installation von unsichtbaren Regalhalterungen erfordert Präzision. Zuerst werden die Halterungen an der Wand befestigt, wobei darauf geachtet wird, dass sie exakt auf gleicher Höhe und im richtigen Abstand zueinander angebracht sind. Anschließend werden die Regalbretter, die passende Bohrungen aufweisen, über die aus der Wand ragenden Arme der Halterungen geschoben. Der Großteil des Gewichts wird dann von diesen Armen getragen, während die Halterungen von außen nicht sichtbar sind. Eine Wasserwaage ist während des gesamten Prozesses unerlässlich, um ein gerades Ergebnis zu erzielen. Die richtige Positionierung der Bohrungen im Regal ist ebenfalls entscheidend für einen festen Sitz.
Sind schwebende Regale nur etwas für moderne Einrichtungsstile?
Nein, schwebende Regale sind äußerst vielseitig und lassen sich problemlos in verschiedenste Einrichtungsstile integrieren. Ein einfaches Massivholzregal passt hervorragend zu einem rustikalen oder skandinavischen Stil, während dunkles Holz oder metallische Elemente gut zu einem industriellen oder minimalistischen Ambiente passen. Selbst in klassischen oder traditionellen Umgebungen können sorgfältig ausgewählte schwebende Regale als dezente und dennoch funktionale Akzente dienen. Die Materialwahl und die Oberflächenbehandlung sind hierbei ausschlaggebend für die optische Anpassungsfähigkeit.


